How to age verify via Yoti for Headmistress Valentina Nicole Finsub Application


You're here because you are filling out Headmistress Valentina Nicole's Age Verification section of your finsub application. Below I will write out a visual walk through to help you through the fairly simple process. Gone are the days of blurring ID's and hoping for the best, that what third party verification Yoti is for. In total it shouldn't take longer than 8 minuets including all the steps and verification processing time is relatively quick. Let's get started...
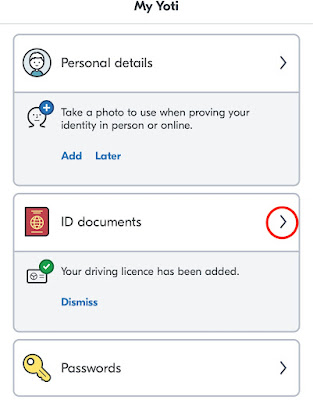
A screenshot of the “My Yoti” dashboard in the app, displaying three sections: “Personal details” with an option to add a photo, “ID documents”, and “Passwords.”
Here is what the Yoti Home screen looks like, as you can see I've already successfully added a ID Document. Click the Arrow to Continue.


A screenshot of the “ID documents” section in the Yoti app, showing a “Driving Licence” entry under the “Current” tab, with an “Add ID document” button highlighted in red at the bottom.
Now you're in the ID Documents section click the 'Add ID Document' Button below.
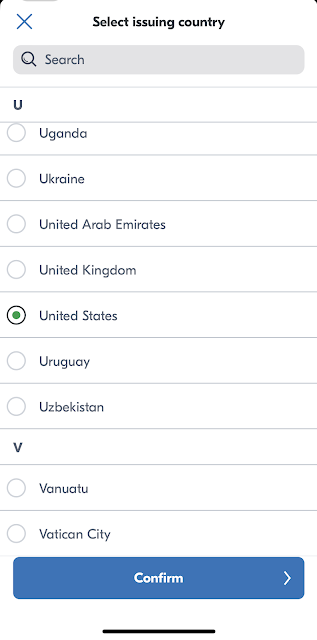
A screenshot from the Yoti app showing a country selection menu, with a scrollable list of countries in alphabetical order. The “United States” option is selected, and a “Confirm” button is visible at the bottom.
Next Select the Issuing Country of your ID Document and select 'confirm' to continue. 


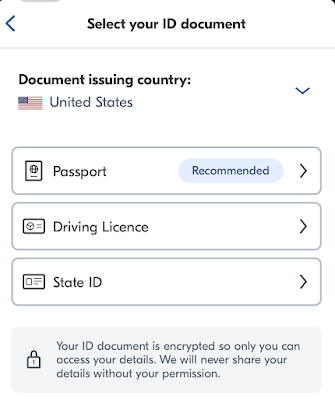
A screenshot from the Yoti app displaying the “Select your ID document” screen, with the issuing country set to “United States” and options for “Passport” (marked as Recommended), “Driving Licence,” and “State ID,” along with a note about encrypted document details at the bottom.
You have three options for ID verification; Passport, Driving License, & State ID. I have Found that License for me personally was the easiest to complete.


A close-up screenshot of the “My Yoti” interface, highlighting a large blue “Share” button.
Once you complete the chosen ID of choice and it has been verified, go to the main page and click on 'Share'

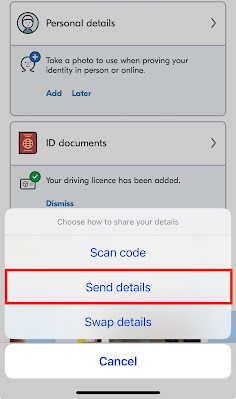
A screenshot of the Yoti app showing a pop-up menu titled “Choose how to share your details” with options for “Scan code,” “Send details” (highlighted in red), “Swap details,” and “Cancel.”
Next Click on 'Send Details'


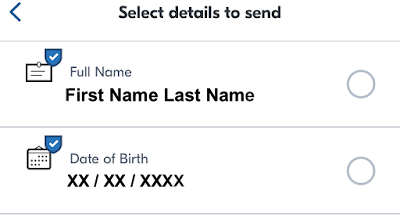
A screenshot titled “Select details to send” showing checkboxes for “Full Name” and “Date of Birth"
Click on 'Date of Birth' Option


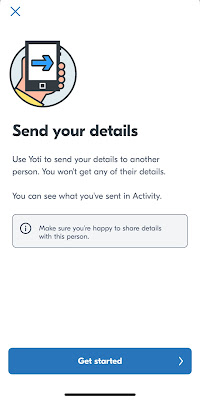
A screenshot titled “Send your details” with an illustration of a hand holding a phone and a blue arrow. It explains how to send details using Yoti and includes a “Get started” button at the bottom.
Next Click on 'Get Started' 
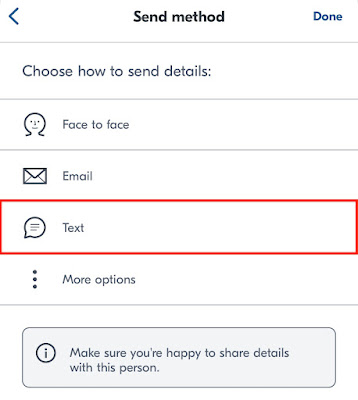
Click on Send Method 'Text'


A screenshot titled “Send method,” showing options for sharing details, including “Face to face,” “Email”, “Text,” (highlighted in red) and “More options.”
Click on Send Method 'Text'


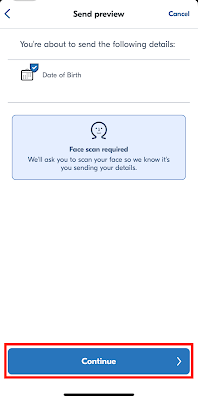
A screenshot titled “Send preview” showing the selected detail, “Date of Birth,” and a notice that a face scan is required. A blue “Continue” button is highlighted at the bottom.
Review Send Preview Then click on 'Continue' Button


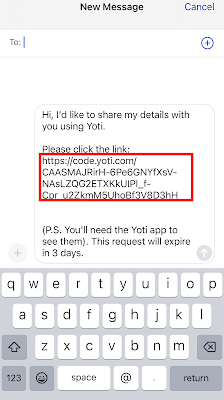
You will be prompted with a Message Template with a link, Copy that link and paste it inside of your application to complete it and you're done.  

Popular Blog Posts

Headmistress Valentina Nicole's Limits | Kinks | Fetishes

The Art of Submission: Understanding and Embracing the "Dick Tax" in Femdom/Findom